How to Create an Invoice in Excel: Invoicing Solutions for Small Business
Small businesses can create their own invoices in Microsoft Excel to start billing clients for their services.
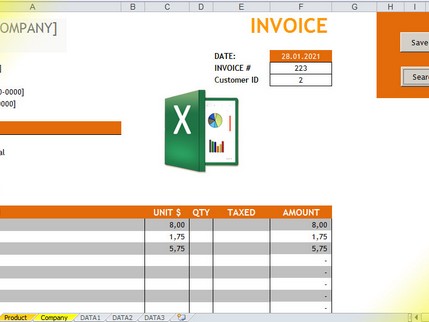
You can either use a customizable Excel invoice template or create your own professional invoice from scratch.
How to Make an Invoice from an Excel Template (Windows)
Businesses can use customizable Excel templates to invoice their customers. To create an invoice from an Excel template on a Windows PC, follow these steps:
- Open Microsoft Excel
To begin making an invoice from an Excel template, you’ll first need to launch Microsoft Excel on your PC.
- Search for an Invoice Template
Once Excel is open on your computer, use the search bar that’s located at the top of the window and enter “invoice” to find invoice templates. Make sure you’re connected to the internet to perform the search.
- Choose Your Template
Scroll through the different invoice template options to find one that works for your business. Excel offers a range of invoice templates, from sales invoices to service invoices and shipping invoices. Choose a template that fits your needs and has a design that fits with your company branding.
- Open the Invoice Template
Once you’ve chosen a template that works for you, click on the template to preview it and then hit the “Create” button to open the Excel template in a new window.
- Customize the Invoice
Once you’ve opened a new spreadsheet using your selected template, you’ll need to edit the invoice to reflect the details of your project. Be sure to include the following information:
- Your logo, if you have one
- Your business contact information, including your name, address, phone number and email
- Your client’s contact details
- The invoice date
- A unique invoice number
- The payment due date
- An itemized list of your services with brief descriptions, the hours worked or quantity and the rate
- A subtotal for each service
- The payment terms, including payment methods and late fee details
- The total amount due for the invoice, including applicable taxes
- Save the Invoice
When you’ve added all the necessary information to your invoice, save the completed spreadsheet to your computer. Save it as a .xlxs format document so you can edit it later if needed. You should also save it as a PDF and send that version to your client, so it can’t be altered.
- Send the Invoice
Send the completed invoice to your client, either by email or by mail. Include a short cover note that highlights the important details, like the invoice due date and the total amount owing.
How to Make an Invoice from an Excel Template (Mac)
To make an invoice using an Excel template on a Mac computer, follow these invoicing steps:
- Open Microsoft Excel
First, open Microsoft Excel. Click File on the menu bar and then click New from Template. A page will launch with a selection of available templates.
- Search for an Invoice Template
To filter the template results, click on the search bar in the upper right-hand corner of the page, type “invoice” and hit enter to search.
- Choose Your Invoice Template
There are a variety of Excel invoice templates to choose from, including business invoice templates and templates that use formulas to automatically calculate taxes. Select one that provides all the information you need and features a design that works with your company branding.
- Download the Template
Once you’ve found an Excel template to suit your business needs, click on the template to open a preview page. Then, click the “Create” button to open it as a new spreadsheet.
- Customize Your Invoice
Edit the invoice template to include the specific project details. Remember to include the following information:
- Your logo, if you have one
- Your business contact details, including your name, address, phone number and email
- Your client’s contact information
- A unique invoice number
- The invoice date
- An itemized list of the services you provided the client, including the quantity or hours worked and the rate of pay
- A subtotal for each of your services
- Your payment terms, including accepted payment methods and late fee terms
- The payment due date
- The total amount due, including any applicable tax
- Save the Invoice
When you’ve filled out all the project specifics on your invoice, save the spreadsheet to your computer in both .xlxs and PDF format. When sending the invoice to your client, use the PDF version so it can’t be edited after you send it.
- Send the Invoice
Send the invoice to your client by email or mail. Include a brief note that calls out the important invoice details, such as the deadline for payment and the total amount due.
How to Create an Invoice in Excel from Scratch
Learn how to create an invoice in Excel from scratch by following these easy steps:
- Open a Blank Excel Workbook
To begin creating a new invoice in Excel, open Microsoft Excel on your computer and then click Open a Blank Workbook. A new blank spreadsheet will open.
- Create an Invoice Header
Add a header to your invoice. Include important billing details in the header, including:
- Your logo
- Your business contact information
- The invoice date
- A unique invoice number
- Add the Client’s Information
Include your client’s contact information, including the relevant contact person’s name, address, email and phone number.
- List the Payment Due Date
Include the payment due date on your invoice. Write out the full due date, i.e. “Payment Due December 31, 2018” instead of more vague terms, such as “Payment Due in 30 Days” which can lead to confusion and missed payments.
- Add an Itemized List of Services
Create an itemized list of the services you provided. Create a column for a description of each service, a column for the quantity or hours worked and a column for your rate. Then include a final column with a subtotal for each service listed.
- Add the Total Amount Owing
One benefit of creating invoices in Excel is that the spreadsheet can do the math for you. Use Excel’s SUM function to calculate the total due and add it to the bottom of the invoice. For example, if you need to add up the subtotals in Column C from cell four through eight to calculate the total due, just enter the following formula in cell C9:
=SUM(C4:C8)
- Include Your Payment Terms
Add your payment terms to the bottom of the invoice, including the payment methods accepted and the details of your late fee policy.
Free Microsoft Excel Invoice Templates
You can download a wide range of customizable Excel invoice templates online. We offer a selection of free invoice templates available to download in Excel, Word and PDF formats. The templates are tailored to different industries and business models.